Painted Pillow Tutorial

For years I have said “You’re either the bird, or the windshield”. You want to be the bird. At least in my mind you want to be the bird. My take is that the bird leaves a mess on the windshield and flies away.

I suppose one could look at that statement and think “No, I want to be the windshield”, because in their version, the bird crashes into the windshield. It does happen, but my version is less traumatic for the bird and the windshield. The driver, too.

My book club friends and I use this phrase all. the. time. We shorten it and just say “Bird”. When something good happens you are the bird. When you get a job, you are the bird. When your kids make straight A’s, bird.  As a tribute to these girls, I made a bird pillow. It was so much fun to make!

Here are the steps to follow if you want to make your own, or any other pillow.

First, determine what size you want your pillow and your text. Open a word processing file (pages, word) or another program (I use Photoshop) and print out your text. I am using a graphic for the ‘i” but you can use any combination of letters, numbers, or symbols.

IMG_2216

Next, tear off a piece of freezer paper and draw a straight line so your word will be level. Place the text under the freezer paper, being sure it’s aligned with the straight line you drew, and trace.

IMG_2401web

Using small scissors (they get around the little curves much better), cut out your word and iron it to the right side of your fabric.

Then paint. I used a black acrylic paint that is suitable for fabric. Not all acrylic paint is so please be sure to read carefully.IMG_2402web

IMG_2220

Let the paint dry for a bit, and remember to put newspaper, scrap fabric, something under where you are painting so paint doesn’t get everywhere.

IMG_2522

Finish your pillow with some bias cording, trim, anything and enjoy!

Cloche Hat

My Intown guild always has a group quilt in process. Basically, you get quilt blocks made to your size, color, pattern, etc. specifications and assemble. I’ve talked about it before, I think. One member keeps the master list of when members “join” – it’s not an official sort of thing – and we go in order.

Our latest member to get her quilt requested a hat, shoe, purse block since she (ahem) likes to shop. My absolute favorite hat is a cloche. I own several, and want to buy more. A girl can always use a cute hat, right? I wanted to use bold fabrics, and I wanted my hat to have a little interest. The leaves are from an old Amy Butler fabric, the ribbon is a Lakehouse fabric, and the “pin” is a Timeless Treasures fabric.

We were asked to put some bling on it, so there may be jewels in this blocks future, though I’m not entirely certain yet….
2015/01/img_2440.jpg

Handprint Christmas Tree Skirt

under the tree

I was so excited when this bundle of awesomeness arrived from Michael Miller Fabrics a few weeks ago, and couldn’t wait to get started on my tree skirt.

fabric is here

What you’ll need:

9 fat quarters
4 – 1/2 yard pieces for yo-yo’s and handprint borders
buttons – approximately 80
1/2 yard solid fabric
1/2 yard for binding
1 2/3 yard for back plus an 11″ x 60″ strip of fabric
3/4 yard of ric-rac or ribbon (cut into 9″ pieces)
acrylic paint to match
something round to cut yo-yo’s
marking pen
tape measure
basic sewing supplies – sewing machine, scissors, thread, pin

I started by making my yo-yo’s. Trace circles on your fabric and cut them out. I used a 4 1/2″diameter circle for my yo-yo’s, and you’ll need to make 80.  I have a set of templates from Karen Kay Buckley’s Perfect Circles that made it very easy to trace, but any round object you have in your house will work. The number of yo-yo’s you need may change slightly if you use smaller or larger circles for your yo-yo’s.

circles 2

buttons and yoyos

Make your yo-yo’s, then sew a button in the middle. Any buttons that were too small were layered with another button. Put your yo-yo’s in a bag until the tree skirt is made.

yoyos

Determine fabric placement for the top of your tree skirt. I put the fat quarters on my floor and played with them until I was happy with how they looked. Once you know where you want your fabrics, cut the center block 18 1/2″ square. Sew three rows of three fat quarters, then sew the rows together. The two outer rows won’t match corners with your center block. That’s okay.

To make the bottom of your tree skirt, start by trimming the selvedge off one side of the 1 2/3 yard piece. Sew the 11″ strip to the 1 2/3 yard piece to make a 60″ x approximately 56″ square (can vary depending on WOF).

Place the bottom of the tree skirt to the floor with the right side DOWN. Use some masking tape to secure it, then place the top of the tree skirt over the bottom piece with the right side UP.

top and bottom

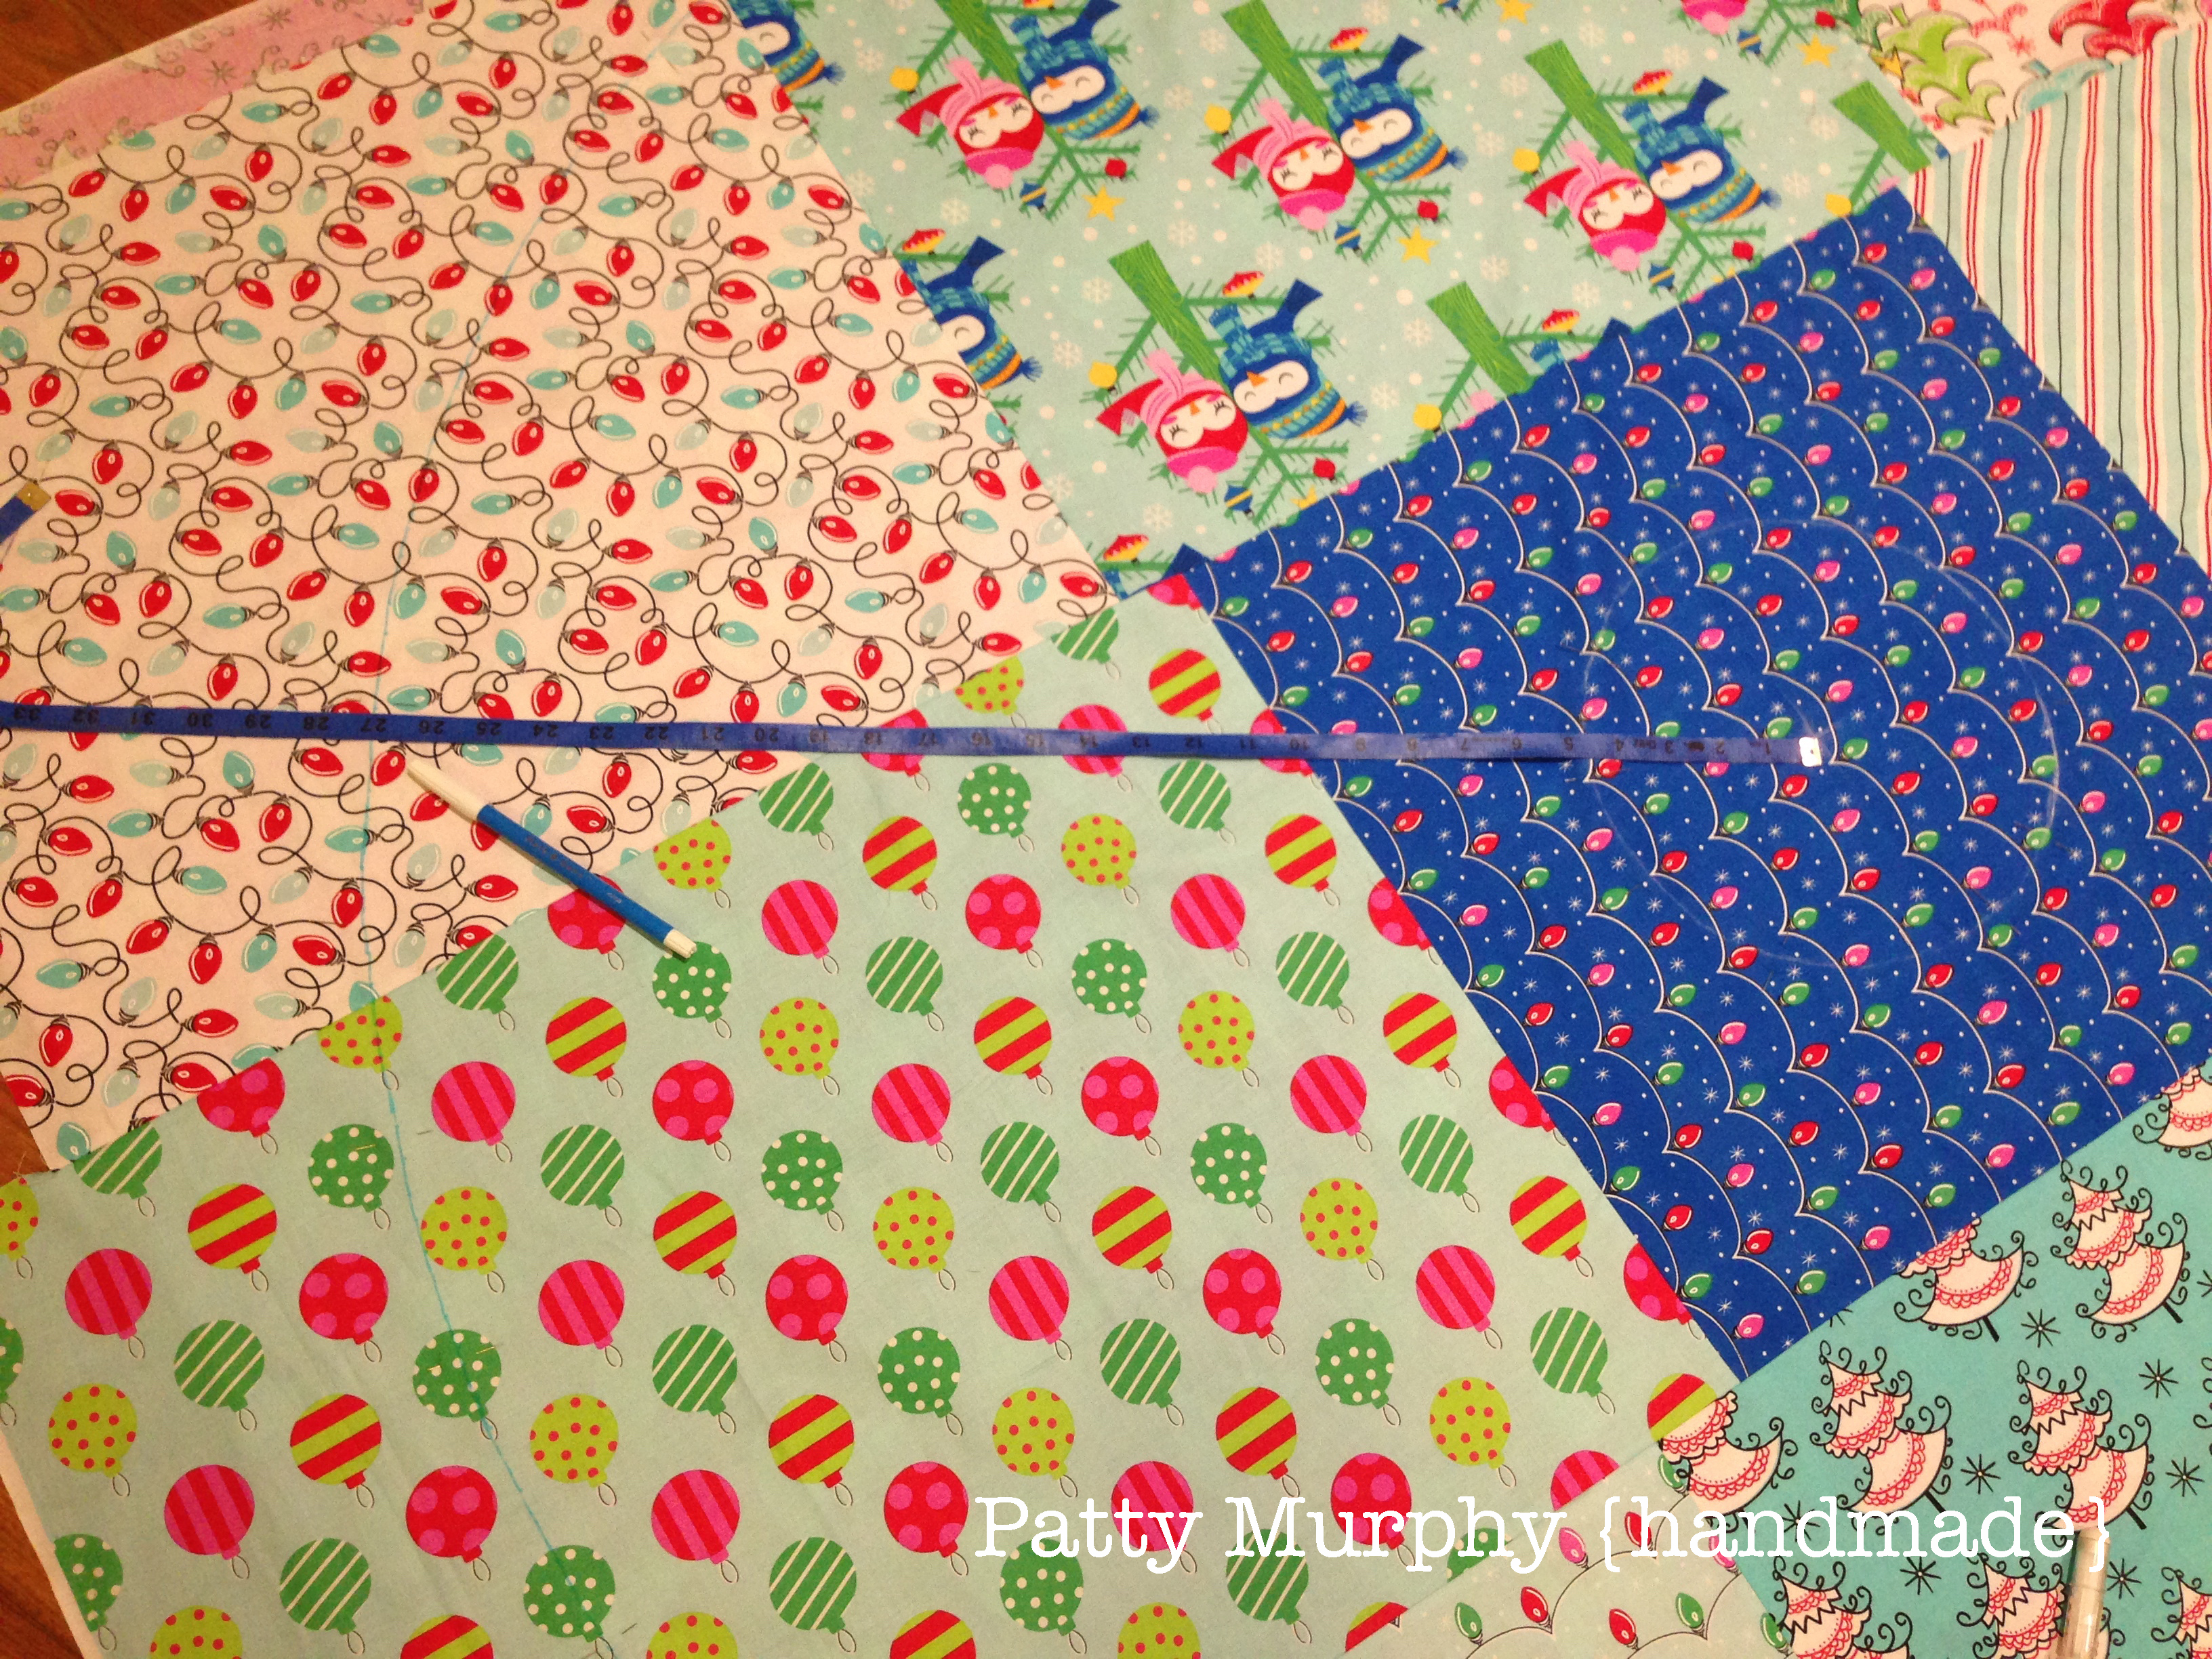
Find the center of the center block, and mark it. Once you have the center, measure 4 1/2″ from it in each direction, working your way around and making a circle. I used chalk, but a pencil works better.

middle

Measure 26″ from the center in every direction to make your outer circle.

outer circle

Once you have your circles measured, pin, pin, pin! It is important to pin like crazy so you don’t get any wave in the top or bottom pieces. Once you’ve pinned the circle, draw straight lines from the inner circle to the outer circle to make your opening. I played with it until I found angles and opening sizes that I liked. You can also grab an old tree skirt and use it as your pattern. Baste the pieces together with a scant 1/4″ seam.

baste

Once you’ve basted the top and bottom together, cut off the excess fabric.

cut

cut 2

I chose to attach my pieces with bias binding, but you can finish it any way you’d like: sew the pieces together, serge the edges, add a ruffle, add decorative trim – the possibilities are endless.

bind

Attach the binding, or finish the edges however you’d like, then sew on the yo-yo’s. Be sure to pull out any basting stitches that peek out.

tack it

Cut 6″ x 7″ rectangles from the solid fabric and cut 2″ strips of fabric to border the handprint blocks. Sew the border print to the solid block, then iron the border piece in half to the wrong side. I didn’t want a huge border, and if you iron the fabric back it’s easier to attach to the tree skirt.

squares2

Use ric rac or ribbon to secure the tree skirt together while it’s under your tree. I tacked a piece of ric rac three inches, and about halfway down, on each side of the tree skirt. Ideally you’d attach the ric rac before you bind or finish the edges, but I forgot, and since this is used once a year I decided it’s alright. I stitched in the ditch to make my error less noticeable.

ricrac1

Sew the blocks you’ll use for the handprints to the tree skirt.  I tacked them down in each corner and the middle of each side so I can re-position the blocks as the years pass. Once they are in place, put acrylic paint on little hands and make your mark. If your kids are really small, it may be easier (better, less messy) to work with paint before putting the handprint blocks on the tree skirt. You can leave some of the blocks blank and add a handprint each year. You could also add photos, or generally embellish however you’d like. Just have fun!

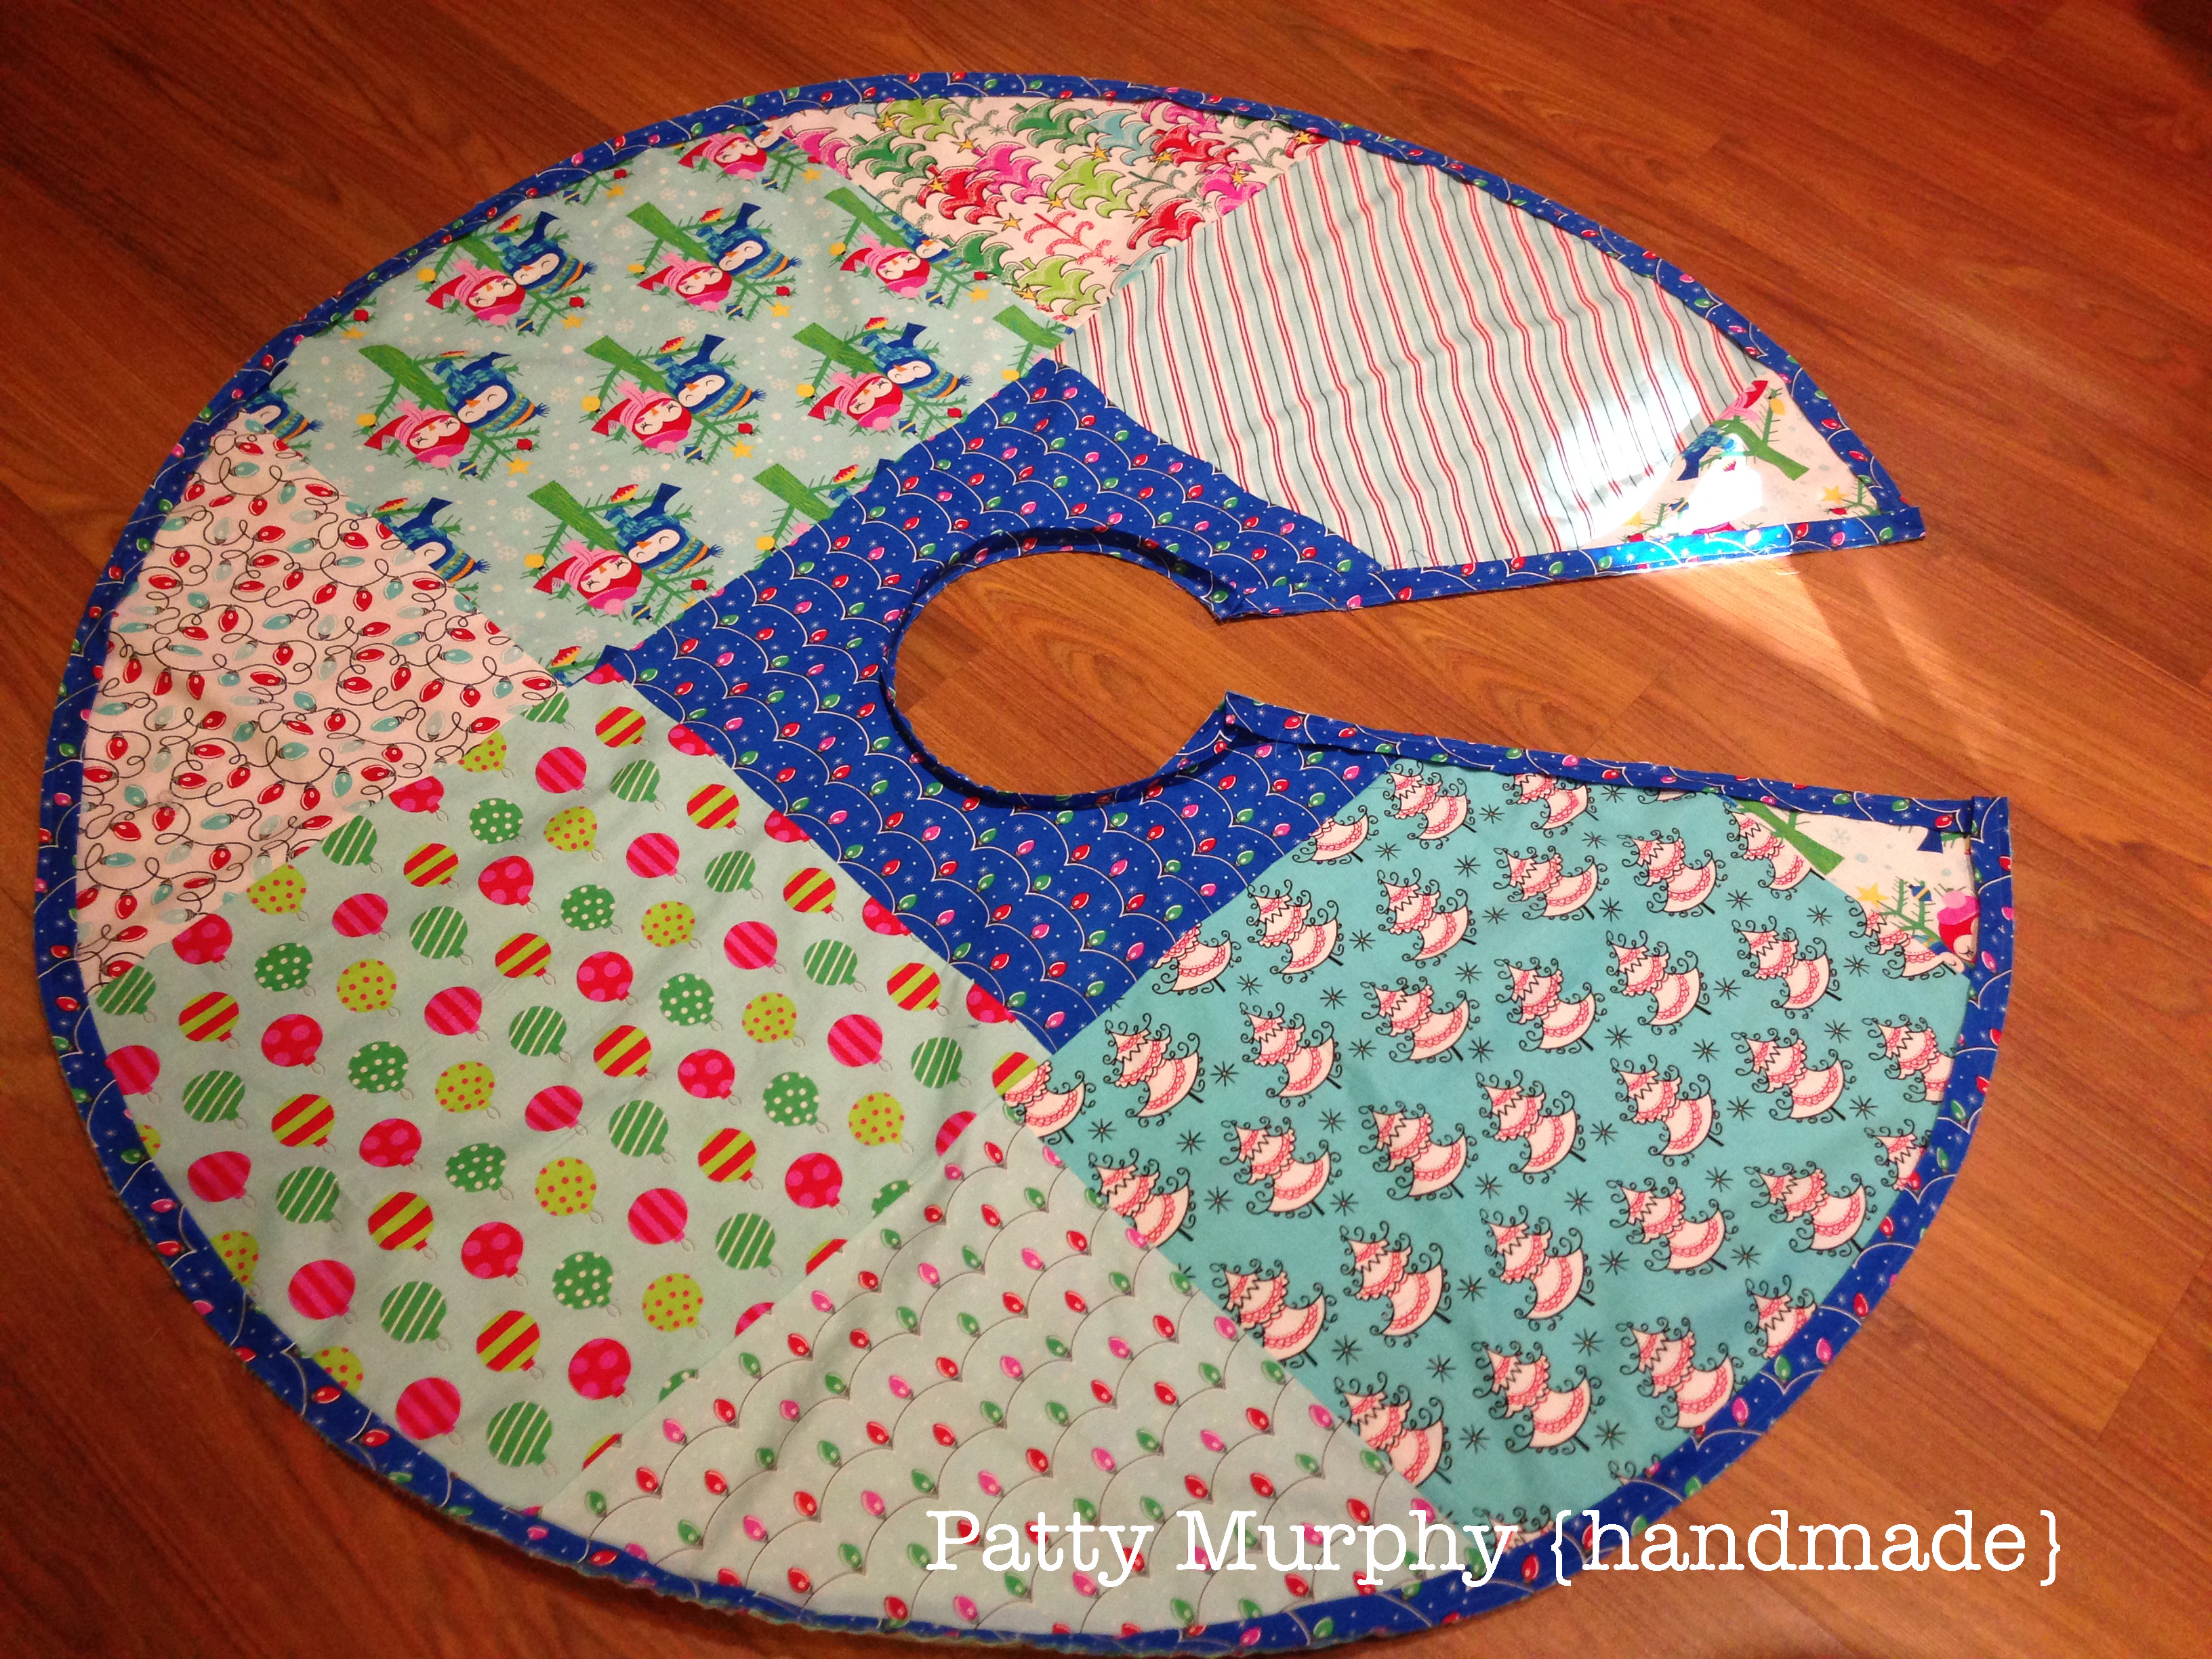
voila 2

Merry Christmas, y’all!


DIY Glitter Christmas Trees

I didn’t decorate the house as much as I wanted last year. Once again, I blame the renovation, but now that’s over so I can go wild. Okay, just a little.

I wanted to make some more decorations but didn’t want to break the bank. Solution? Glittered Christmas Trees. I bought a few styrofoam cones, glitter, and spray glue at my local craft shop.

IMG_2246.JPG

I sprayed the cones with spray glue, and poured glitter over the cones. I found it helpful to spray the glue on one side of my craft area, and glitter on the other. I applied glitter over a plastic plate so I could re-use the excess. If you spray glue over the plate the glue will stick and you can’t re-use it.

I chose to keep my tree decorations simple. The balls on top were in a set of holiday balls at the local craft store. They have a wire on the bottom so I could stick my ribbon through the wire then insert the pieces into the top.

I put my trees on a plate and decorated the base with cedar, white pine, and fir springs.

IMG_2269.JPG

Indigo Quilt

I eyed some indigo fabrics at market for three years. Maybe longer. Every time I was at market I wanted to buy them but couldn’t bring myself to do it. I finally made the plunge when I was pregnant with Q-Man, and knew it would be a while before I was at any market.

I’ve had a plan for years and can finally execute it.  To be fair,  it took me another three years to gather the grey/beige/greige background fabrics, plus the move, renovating, blah, blah, blah… I have a groovy combination of oriental prints, taupes, some modern pieces, and scraps friends gave me that were just big enough for my project. The circle templates make cutting out the pieces really easy, too. Definitely worth the investment!

IMG_2105.JPG

Christmas Geese, part three

Four days of trimming flying geese. My vision for an all flying geese quilt seemed like a good idea when I started it. To be fair, I was only working on it for an hour or two each night after the kids were in bed, and there are several HUNDRED of them, big and small. I’m contemplating adding some strips to the quilt to break it up a bit, but will have to see how that looks.

I am super happy that I can start laying out the quilt tonight! Even better, I can sew without my sewing machine, meaning my husband can tolerate being in the room with me. The sewing machine noise drives him bananas.

IMG_2055.JPG

Mid Century Modern Quilt

Since I’m knocking things off my list, here’s another.

Husband doesn’t get excited about quilts the same way I do, but when I showed him this one, and told him I wanted to make it for our bedroom he was all for it.

IMG_2031.JPG

A trip to my favorite quilt shop to pick up a collection of Kona cottons, and I was good to go!

Originally, I planned to have the quilt drop to the floor, but I didn’t like it. So, I hacked off eight-ish inches on each side to get a drop I was happy with. Now, that fabric was sure as heck not going to go to waste, so I pieced parts into the back, some became strips on the pillows, and the rest I used to make cording for the pillows. Nice accent, huh? Oh, and the print outs above my bed? I saw something similar on Etsy, but couldn’t pay $15/each when I knew I could make them with scrapbook paper from Michael’s, and some inexpensive frames from IKEA.  Until we finish building our headboard it will be just fine. And the cool prints on the right? You can get those here. I LOVE this guys artwork!

IMG_2037.JPG

The back was almost as much work as the top, and I love it! The polka dot is a fabric that I found here. It’s on the back of the Euro pillows and it cost a pretty penny, so I used every inch I had. I smile looking at it, and think it’s great that my bed will (maybe) look mostly made even when it’s not. Ha!

IMG_2033.JPG

My friend, Regina, quilted this for me. It’s got a mid century pantograph, and orange thread. I’ll get a close up soon.